|
<< Click to Display Table of Contents >> Capture new floor |
  
|
|
<< Click to Display Table of Contents >> Capture new floor |
  
|
With this function, 3d-floors can be created.
Commandline: _ETAGEDEF
Assistant: ![]() | Energy certificate |
| Energy certificate | ![]()
Assistant: ![]() | Room Manager|
| Room Manager| ![]()
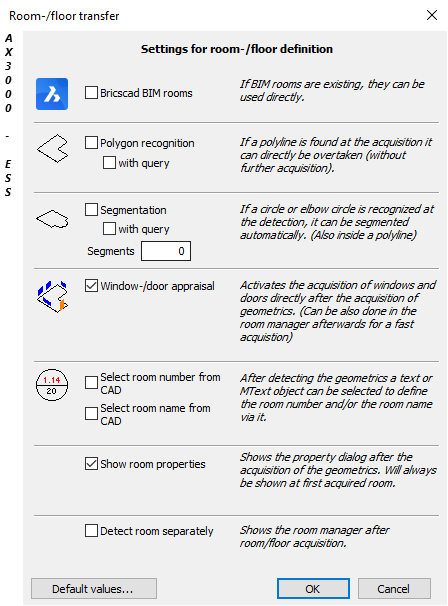
After activating the function the window "Room-/Floor transfer" opens.
Define the settings for the take over of the rooms/floors.

Activate the necessary object in BricsCAD and select a floor plan.
Walls created with Wall definition will be automatically used. If this information is not found, each wall type must be defined first.
Pull a window over the 2d-floor plan and all objects defined with the functions Window definition and Door definition will be respected.
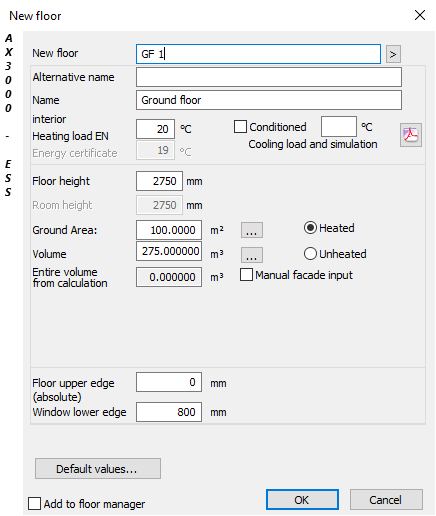
With the following Dialogue further room details can be entered.

Option |
Description |
|---|---|
New floor |
Short name of the floor. |
Alternative name |
Additional short name (e.g. for from ALLPLAN imported data) |
Name |
Name of the floor. |
Interior Temperature |
Room temperature. Selection for EN12831. When a temperature is entered, the sample values can be modified or deleted. |
Floor Height |
Distance between finished floors. |
Ground area |
Ground area of the floor. |
Volume |
Volume of the floor. (Is calculated from floor heigth and ground area) |
Upper floor edge (absolute) |
The absolute building floor height. |
Window lower edge |
Difference between upper floor edge and lower edge of the window. |
Default values |
Here you can choose standard components. |
After confirming wiht "OK" the Room/floor overview opens again. The floor can be edited manually here, if necessary.